Showing posts with label Wet n Wild. Show all posts

Friday, January 4, 2013

Makeup Collection (1/13) Pt 3: Eyeshadow


Now for my favorite part - the EYESHADOW!


Here I have my drugstore palettes. Clockwise from the bottom - ELF Eyeshadow Quad in Butternut, NYX Champagne and Caviar, Wet n Wild Trio in Don't Steal My Thunder, WnW Blue Had Me At Hello, and WnW Petal Pusher.

I only have a few singles, as I love the value pricing of palettes. Clockwise from the bottom left, I have theBalm's Luscious Lani, MAC Melon pigment, Clinique Lucky Penny, MAC Goldmine, and Smashbox Brazilian Bronze

Here are my mid-size high end eyeshadow palettes. Clockwise from the bottom I have one version of Estee Lauder's Deluze signature palette, Clinique Eyeshadow Trio in Come Heather, Urban Decay Feminine palette (2012 edition), and two random Clinique GWP's in radically different packaging... Huh...
These two are my big palettes - Victoria's Secret Ultimate Supermodel Kit, and of course my UD Naked!

Monday, August 20, 2012

Homecoming Makeup 2: Silver Cut Crease (afforable products)

 Here's my second homecoming look - a slight cut crease with Wet n Wild. The colors aren't the most pigmented, but do give a nice shimmery effect. I didn't really wear eyeliner and mascara out of this out of pure laziness - I wash off most tutorials after I'm done shooting.
Clockwise from eyeshadow: Wet n Wild Don't Steal My Thunder Trio, Tweezerman Classic Eyelash curler, NYX eyeshadow base in White, random black pencil liner (use any of your choosing; preferrably one made for smudging), my must have eye brushes, and a random Clinique mascara (use any mascara you like).
The bare eye 
 Apply the shadow base to the application area - lashline to browbone
 Sweep up the browbone shade on your flat shader
 Apply it to the lid as shown nyah.
 Now take the pencil brush and really work it into the eyelid shade - it's a pretty unpigmented shade but it'll work.
Blend it into the outer and inner thirds, but leave the middle to the frosty white. 
 Now this part looks scary, but we're just drawing the black eyeliner into the crease.
 This part looks wayyy better. Remember for the cut crease effect, blend upward and never into the lid.
Now take the pencil brush and sweep it into the pencil brush.
And now apply it on top of the blended eyeliner and pull upward and NOT onto the lid
Here it is more blended.
If you want, apply some silver under the outer eye.
Do anything with your eyeliner, curl your lashes, apply mascara, and TA-DA! (if you wanna know why I didn't do either, see opening paragraph)
Closed eye view.


Wednesday, August 15, 2012

Homecoming Series Kick-off: 2nd place in the Navy (affordable)

You wanna know a secret? I don't plan these tutorials. The only ones I've planned are the middle school ones and one of my upcoming ones. Here I'm starting my Homecoming series. I've always loved dark, sultry eye makeup, but I don't have many occasions to showcase it myself. Here we're going for a Silver (get it? 2nd place?) smokey eyes with Navy accents, which is wearable on really any dress (tip - silver works with every dress color! Although if you're gonig for a stunning silver dress, I'd try a brown or black smokey eye unless you wanna look matchy-matchy)
 Here we're using Covergirl lashblast fusion mascara, my highly abused Wet n Wild Blue Had me at Hello palette, Wet n Wild creme eyeliner in black, NYX eyeshadow base in white, and Maybelline Expertwear eyeliner in slate gray.
 Apply the eyeshadow base and blend out to cover from lashline to browbone.
In the Blue had me at Hello palette, sweep your flat shader brush on the silver 2nd shade in the left column ("eyelid").
Apply it on the inner half of the lid.
On the right column, 3rd shadow down, swipe your flat shader brush in the navy "crease" shade.
Apply it on the outer half of the lid. Ugh, it looks really bad here.
Swipe your pencil brush into the same silver shade.
Blend the harsh line between the two with your pencil brush.
See? Much better.
Now sweep your pencil brush in the "definer" shade in the bottom right, a glittery black.
Apply it in the outer v, demonstrated nyah.
Now use your fluffy brush in the same shade.
And blend, blend, blend it into the crease to get this effect.
Now use your pencil brush (yes, again) into the navy shade from earlier
And apply it on the outer lash line.
Finally, use your fluffy brush on the "browbone" shade on the top right.
Of course, sweep it right under the browbone.
Sweep your gel eyeliner on the top lashline, and use the grey eyeliner on the lower waterline.
Curl your lashes, add mascara, and TA-DA!

Friday, August 3, 2012

Dupes: Wet n Wild Walking on Eggshells vs Urban Decay Naked


Wet n Wild is well known for high quality shadows at dirt cheap prices, but do they match up to the big boys?

Under natural light, they look very, very close. The texture, however, is much finer on Urban Decay's side.

The highlighter shade is more of a base color with glitter than the frosty effect Virgin has, and Urban Decay has the more soft texture here.

The crease shade closely resembles Smog, but Smog has a gold sheen to it. Besides that, the base color is very similar, but Smog has genuine sheen while WnW has more of a microglitter finish.

Sin and the lid color are the closest out of the bunch. Lid is the ittiest bit darker, but they are very similar until closer examination, but almost identical.

The most obvious difference between the two equal houses is the price. Wet n Wild charges 3$ for the trio, while single Urban Decay shadows cost 17$... each. That would be 51$ for all three, but they are all contained in the 12-shadow Naked Palette (50$). So unless you're shooting for the brand name, Wet n Wild wouldn't be a bad try for duping Virgin, Smog, and Sin!

Wednesday, August 1, 2012

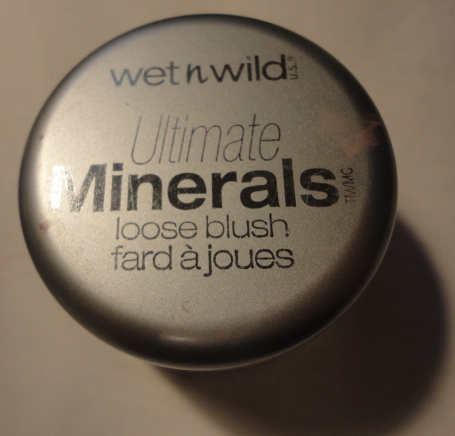
Review: Wet n Wild Ultimate Minerals Loose Blush in Purely Mauve

Light mineral-based formula provides a beautifully healthy flush to cheeks. Get cheeky! This amazing blush is formulated with earth-derived minerals to give you fabulous, good-for-you cheek color that's ideal for all skin types. Create a soft, luminous glow with a natural-looking finish for a subtle vibrancy that's sure to make you blush.


IMO: In all honesty, I only bought this cause it was half off in the CVS bargain bin (originally $4 for 0.17 oz). I use this everyday, and I really do like the pigmentation, but the packaging is a turn off for me.


Light mineral-based formula provides a beautifully healthy flush to cheeks. Get cheeky! - I love this bright yet subtle color this have. Just make sure you use a LITTLE or you'll look like my hand up there.


This amazing blush is formulated with earth-derived minerals to give you fabulous, good-for-you cheek color that's ideal for all skin types. - I have dry skin, and it does fade a bit by the end of the day. However, I use the teeniest amount in the first place.
Create a soft, luminous glow with a natural-looking finish for a subtle vibrancy that's sure to make you blush. - As referencing the swatch above, the finish isn't matte and yet not enough to be satin. Therefore, natural finish.


On to my main issue - the packaging. I've never used a loose makeup product before. and it's really, really hard to get a uniform amount of product. I usually use one or two taps into the lid and swirl my brush around, but sometimes I get wayyyy too much. If you can deal with this, sure, buy. But next time I'm looking for a daily blush, I'm sticking with pressed.

Thursday, July 26, 2012

High School Makeup 102: Wants, not Needs

(Picture courtesy of Seventeen.com)
Note: This post contains high end products I have used and loved for months! You can always find a dupe in the drugstore, but I'm sticking with my classics. I'm suggesting these more towards the high school students than the previous "school makeup" post.

My #1 must have (I've gone through 3 bottles) makeup remover is Clinique Take the Day Off. Just check out my review on why I love it so much!

One must have that you've probably heard of a few quadrillion times is the all famous Urban Decay Naked Palette. I know, I know. You've heard plenty of raves about it already (and if you haven't, where were you when makeup gurus were in an uproar over it?). Well, in short, they're all correct! I know, I know, 50$ is a big thing to drop when you've just escaped middle school. I slowly saved up and got it as a "welcome to high school!" gift for myself (or I made up an excuse, either way). And yes, I like the original better.

Another one of my essentials is eye primer! I use the cult classic Urban Decay Primer Potion -it really amplifies the color and prevents it from sliding around. This is another doozy at 20$ a pop, but a free travel size comes with the aforementioned Naked palette, plus I bought a tube in December, and it's still going strong. I've probably only used up 20% of it, and it's been my daily essential! It also comes in 4 colors variations - I've only used original, but heard great thing about the others.

A good product to have in your arsenal is blush. In pictures, you may notice that your face looks very washed out and pale under flash or other strong light. This can be reversed by using blush, which imitates the rosiness in flushed cheeks. Personally, I never get red or even pink, even when my eyebrows are waxed. My everyday blush is Wet n Wild mineral blush in Purely Mauve (I think it's discontinued). I'll admit the sole reason I bought it is because is was in the sale bucket at CVS. It's extremely pigmented, but a bit of a hassle to get out because it's loose. It's always good to pick up a blush brush too.

Along with acne, comes oiliness. I don't have oily skin, but my dry skin still casts shininess. When shopping around for a powder, I came across Clinique's Almost Powder. It provides a light coverage for minor imperfections, but is still sheer and best of all, hypo allergenic! However, I warn you that it has SPF 15 and is 13% titanium dioxide, which reflects badly in camera flash. I suggest finding another, non-SPF powder for picture
occasions. I use a kabuki brush by Essence of Beauty with this powder.


Finally, every girl should own a natural lipstick for dances when rocking a smokey eye (courtesy of that Naked palette up nya). I'm not a lipstick person, so I just use my Estee Lauder Pink Parfait that was in a GWP. However, some famous/popular ones by MAC are Angel and Blankety, the former being  more pink and and latter more peach. You'd be best off going to a counter though.

You don't need hot pink eyeshadow, or lipstick that stops cars. You don't need to wake up an hour earlier or skip breakfast to meticulously spackle on foundation you DON'T NEED. Makeup may be expensive, but it's fun!