Showing posts with label natural. Show all posts

Thursday, August 16, 2012

Tutorial: My "signature" eye look for school

I do switch up my makeup a lot, but this is my most worn look because it's not across so many big palettes. This is my favorite one for school that really brings out shine.
 From top to bottom, left to right, there's Covergirl Lashblast Mascara, Tweezerman Classic Lash curler, MAC Fluidline in Blacktrack, Clinique Pink Chocolate eyeshadow (a light pearly pink, I can't find it on Clinique's site), Urban Decay Primer Potion, Ecotools Angled liner brush, Urban Decay Shadow brush, MAC 217, Smashbox Brazilian Bronze, and Clinique Lucky Penny. I forgot to add the Urban Decay 24/7 liner in Underground.
 Bare eye, as always.
 Apply and spread the primer across the lid and up to the brow.
And now use your flat shader brush on one of my favorite eyeshadows - Clinique Lucky Penny 
 And pat it right across the lid.
 Now swipe your fluffy brush/217 into Brazilian Bronze
 And sweep it into the crease
 Here's what it looks like so far.
 Now swipe the same fluffy brush into Pink Chocolate,
 And sweep it right under the brow bone.
 Here's the look so far.
 Now take the angled liner brush and swipe it in the gel eyeliner.
 Use it in the outer top half of the upper eyelid, and if you wish use Underground in the lower lash line.
 Now curl your lashes and go!

Monday, August 13, 2012

"Invisible" eye makeup tutorial


I used to go to a school that didn't allow makeup. I didn't wear makeup back then, and my school now definitely allows makeup (and some girls are a little -too- liberal with their eyeliner). Here's a tutorial on how to get a "no makeup" eye look but still enhances the eyes! Btw my nailcolor is OPI Austin-tatious Turquoise from the Texas collection.
From left to right, we're using Tweezerman Classic Lash Curler, MAC 217, MAC 219, Maybelline Great Lash in Clear, Urban Decay 24/7 eyeliner in Demolition, and Urban Decay Buck eyeshadow. I forgot to add  my Urban Decay primer potion >.<.
 Here's a plain eye. Pretty undefined, right?
 Apply some Urban Decay Primer Potion on the lid. I think I added too much here.
 Use the MAC 217 in the Buck Eyeshadow.
 Lightly sweep it into the crease, and if you would like, apply a bit under the outer part eye with the 219.
 Bit of a crazy picture here. but see that part under my lashes? We're putting the Demolition eyelienr here.
 It's a bit hard to see, but here's the liner on my upper waterline.

Add some mascara and curl lashes - Ta-da!

Friday, August 10, 2012

Tutorial: 8th grade makeup


To round off my middle school makeup tutorials, I have my 8th grade makeup tutorial! I realized this look is really, really plain, but meh. You can make your own looks with Champagne and Caviar however you like.

Clockwise from the eyeshadow: NYX 10 Color Eyeshadow palette in Champagne and Caviar, Hard Candy Glamoflauge concealer, Ecotools angled liner brush, MAC 217 (use any fluffy brush you want), Tweezerman Classic Lash Curler, Covergirl Lashblast Fusion, and MAC Fluidline in Blacktrack (really, use any gel liner you want. I grabbed this one first).
 Mah bare eye.
 If you have primer use it here, but as a primer in this tutorial we're using concealer. (Don't know what a primer is? Click here)
 And blend out whatever your primer is.
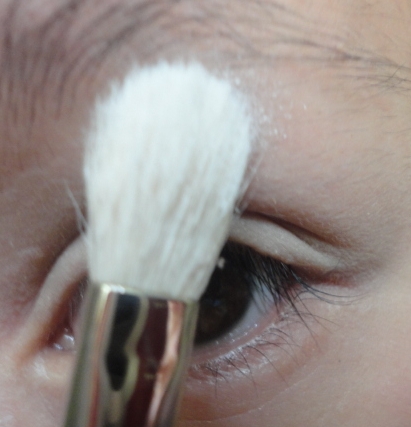
 Now we're gonna add our highlight shade - this matte white in the bottom left of the palette.
 Sweep a sheer layer right under your browbone.
 When people see your eye, they're not supposed to immediately notice the eyeshadow.
 Take any lid shade you want onto your fluffy brush. For whatever reason, I chose the blandest color, and almost-matte almost-my-skin-tone in the top middle.
 Sweep right across the eyelid
 You can really see it here.
 Now we're going to put a color in our crease - my favorite color in the palette actually, on the top row in the far right.
 Blend it right into your crease (where your eye socket ends and the browbone begins)
 Very subtle, and classy. You can switch up all the colors however your like.
 I used a minimal of eyeliner and mascara in the final pic.

Thursday, August 9, 2012

Tutorial: 7th grade makeup

 Now we'll work with the product that many school girls are notorious for abusing: EYELINER! I don't own brown gel eyeliner, because my hair is really dark by itself. So, I use black (no duh).
In clockwise order from the mascara: Covergirl Lashblast Fusion, MAC Fluidline in Blacktrack, Covergirl Wetslicks Fruit in I think Berry Splash, Ecotools angled eyeliner brush, Rimmel London Match Perfection concealer, and Tweezerman classic lash curler. This includes products I used in my 6th grade tutorial, as i didn't do a product overview in that post (or I deleted the picture >.<).
 So dip the eyeliner brush into the eyeliner...
 And apply it as close to the lashline as possible. Since I don't do videos, this is probably the least useful advice I'll give you. But here's my big tip - use small swipes, and don't try to apply the entire line at once. And since you want a look that doesn't make you look like a raccoon, line only the outer half of the upper eyelid.
 If you make a mistake like me, swipe it with a q-tip.
 Ta-da!
 Subtle, yet it's there. Now let's move on to concealer.
 I didn't have any pimples to cover up, so I'm going with under eye concealer. I have slight under eye circles here, so let's cover those.
 Don't do a stream of concealer, just use dots.
 Ugh this picture is so out of focus, but just pat and don't rub. Rubbing makes it worse.
I'm pretty sure the shadow is causing the circles in the first place, but the concealed is on the left and original on the right.

Wednesday, August 8, 2012

Tutorial: 6th grade makeup

AKA How to curl eyelashes, apply mascara, and lip gloss. I'm sorry that I'm such as bad explainer at... everything >.<
This is my eye without curled lashes. Since they point downward and my eye color is dark already, it's very hard to see them.
 Warning: Curling your eyelashes feels REALLY weird the first few times, but you get use to it. You put it as close to your lid as you can without pinching yourself, and squeeze for 2-5 seconds. Repeat while going towards the end of the lash if you wish.
 Now my lashes are much more visible, see? Time to apply mascara.
 Start at the base of the lashes and wiggle the brush on the way up to the end of the lash.
 I LOVE this picture, but see my lashes are darker and a bit thicker.
 I'm pretty sure no one needs a guide on lip gloss, but ehhh. Use the part that dispenses gloss (whether it be wand or the tube) and spread the gloss on the bottom lip.
 I used way too much gloss, but here it is.
 Now pull your lips back and rub them together.
Ta-da, glossed lips!